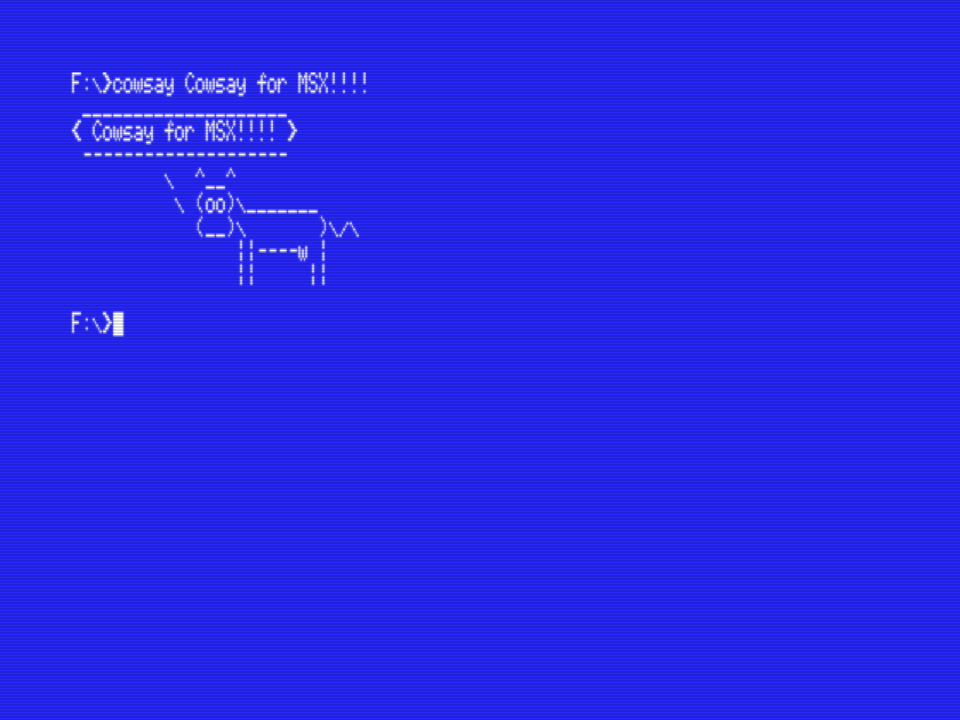
cowsay [OPTION] ...

-b borg mode
-d dead mode
-g gready mode
-s stoned mode
-t tired mode
-w wired mode
-y youthfull mode
-e manually specifies eyes (DEFAULT = oo)
-T manually specifies tongue
-f select cow file
-l display COWPATH directory and exit
-W Word wrap on x column (DEFAULT = 40)

-h display this help and exit
-v output version information and exit
e.g:
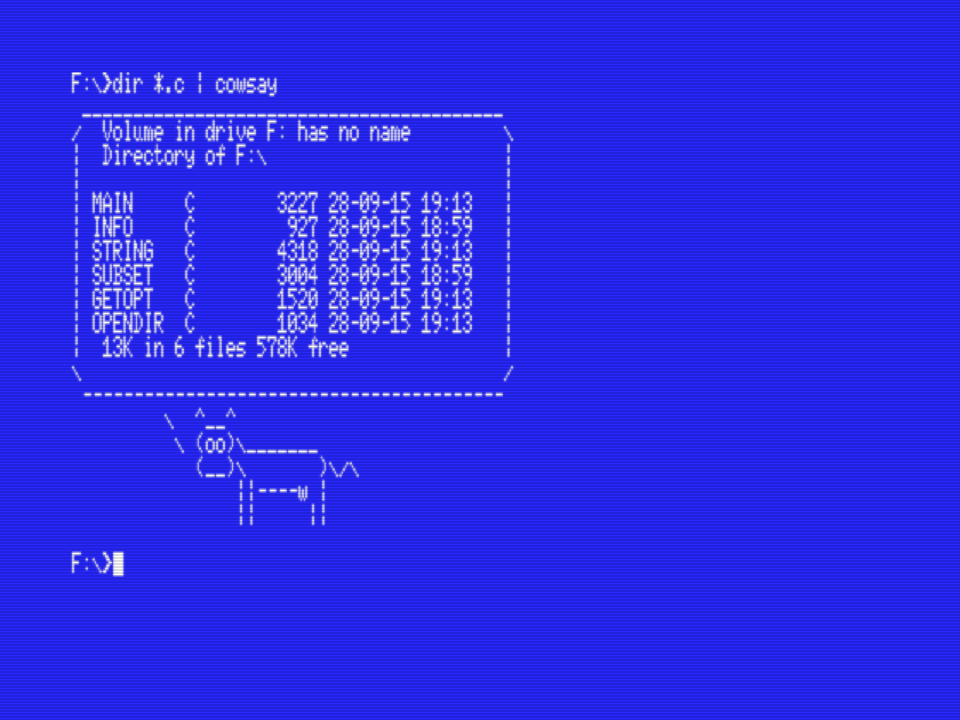
When no text is given the command will wait for text from the command line which can be ended with ctrl+Z. It’s also possible to pipe text into the cowsay program, e.g.:
Environment
To tell the cowsay package where the cows are, set your COWPATH environment variable to the directory these cows are in. At the moment only one path can be set, e.g.:
set COWPATH=A:/cows
Add your own cow templates
These are the simplest sorts of cows; they are just a plaintext file with the ASCII that is the cow in it. It has extension ‘.cow’.
Use $eyes, $tongue and $thoughts in the file. $eyes and $tongue are replaced by the user-specified eyes and tongue, being strings of length two (if the user specifies longer eyes only the first two characters are used; if they specify a one-character eye it is padded with a space). The $thoughts token is the ‘stem’ part of the speech bubble, not the speech bubble itself. For a cow that is thinking, this is ‘o’ (dots leading up to the thought bubble); for a cow that is speaking, this is ” (speech bubble stem).
Any line starting with a ‘#’ will be ignored, even if it is part of your cow!. If your cow has lines that start with ‘#’ that should be part of the cow, indent the entire cow one space.
Example (the default cow, you can see him at the start of the Readme):
# e.g. as default.cow
        $thoughts   ^__^
         $thoughts  ($eyes)\_______
            (__)\       )\/\
             $tongue ||----w |
                ||     ||
Developer notes
To compile the source code, use the ccfull.bat batch file. Don’t forget to edit the batch file for the standard C libraries, beware that this line can’t be longer then 127 chars!
TODO
Fix bugs 🙂
Links
Relearning MSX
Greate series of blog posts written by Javier Lavandeira to setup your MSX-C environment and start learning MSX-C.
cowsay [OPTION] ...

-b borg mode
-d dead mode
-g gready mode
-s stoned mode
-t tired mode
-w wired mode
-y youthfull mode
-e manually specifies eyes (DEFAULT = oo)
-T manually specifies tongue
-f select cow file
-l display COWPATH directory and exit
-W Word wrap on x column (DEFAULT = 40)

-h display this help and exit
-v output version information and exit
e.g:
When no text is given the command will wait for text from the command line which can be ended with ctrl+Z. It’s also possible to pipe text into the cowsay program, e.g.:
Environment
To tell the cowsay package where the cows are, set your COWPATH environment variable to the directory these cows are in. At the moment only one path can be set, e.g.:
set COWPATH=A:/cows
Add your own cow templates
These are the simplest sorts of cows; they are just a plaintext file with the ASCII that is the cow in it. It has extension ‘.cow’.
Use $eyes, $tongue and $thoughts in the file. $eyes and $tongue are replaced by the user-specified eyes and tongue, being strings of length two (if the user specifies longer eyes only the first two characters are used; if they specify a one-character eye it is padded with a space). The $thoughts token is the ‘stem’ part of the speech bubble, not the speech bubble itself. For a cow that is thinking, this is ‘o’ (dots leading up to the thought bubble); for a cow that is speaking, this is ” (speech bubble stem).
Any line starting with a ‘#’ will be ignored, even if it is part of your cow!. If your cow has lines that start with ‘#’ that should be part of the cow, indent the entire cow one space.
Example (the default cow, you can see him at the start of the Readme):
# e.g. as default.cow
        $thoughts   ^__^
         $thoughts  ($eyes)\_______
            (__)\       )\/\
             $tongue ||----w |
                ||     ||
Developer notes
To compile the source code, use the ccfull.bat batch file. Don’t forget to edit the batch file for the standard C libraries, beware that this line can’t be longer then 127 chars!
TODO
Fix bugs 🙂
Links
Relearning MSX
Greate series of blog posts written by Javier Lavandeira to setup your MSX-C environment and start learning MSX-C.
Is it possible to implement NAT routing or firewalling withing docker containers? YES!
Should you use a setup like this in production? ProbablyNOT!
What is it?
An example for building routed networks with docker and docker-compose; intended for use in automated testing setups.
⚠ This is no reference implementation of a NAT router container to be used in production! While the provided material may be used to build test benches, it is considered purely educational!
Default docker bridge network (default in docker-compose) Represents the external network to be routed to (e.g. “the internet”).
☁ internal
Building a NAT router in docker is only possible from macvlan networks, as otherwise all IP traffic is handled directly by the host, outside the realm of influence of a container!
A macvlan network without parent interface. Containers in this network can communicate with each other but not reach targets outside the network by default. A virtual interface is automatically created as parent by docker. A custom subnet and gateway address may be specified from the compose file; if not, docker will assign a random subnet and the first usable (non-broadcast) address on the subnet as gateway to containers on the network.
Containers
The stack is made up of three containers, where each container shares one network with the router container:
external
router
internal
🖥 external
Dummy container as ping target. Sharing the default docker bridge network (external above) with the router container. No further configuration requirements for this container exist.
🖥 router
Attached to both networks. Performing NAT routing from internal to external network and DNS forwarding.
📌 The router assumes the routed internal network to be attached at the interface with the lowest index! Interface order is achieved by providing a priority value in compose. To not rely on interface ordering, use a fixed subnet and provide it in CIDR notation as environment variable ROUTE_NET.
Network Setup
Docker assigns a gateway address as described above to all containers on the internal network. The router assigns itself this gateway address on the internal network interface, using either the explicitly specified address, or deducing the gateway address from the interfaces’ subnet.
The address assigned by docker on the internal interface will be kept, to allow using dockers’ internal DNS resolver to resolve the routers’ address.
Routing
NAT routing is performed using iptables rules. Modifying iptables, requires the container to be ran with NET_ADMIN capabilities. Routing will be configured from internal network to all other networks attached to the router container!
DNS Forwarding
dnsmasq performs DNS forwarding for containers on the internal subnet, to the routers DNS resolver provided by docker. Dockers’ DNS resolver only resolves container names on the same network. As the router is attached to both networks, the local resolver is able to resolve names from both these networks. The router mounts and updates a resolv.conf file in the data/ directory, to be mounted by the internal containers as /etc/resolv.conf.
A note on docker networks and DNS servers
Docker uses an internal DNS resolver for containers. Supplying additional DNS servers via command line or docker-compose adds these addresses to the internal resolver, but does not modify /etc/resolv.conf (except, when explicitly using and specifying a network as bridge-network). The internal resolver does not perform name lookup for DNS servers and has to reach all DNS server from the host network, thus prohibiting the use of container names as DNS servers.
🖥 internal
Connected to the internal network only. For DNS resolution to containers on the external network, mounting /data/resolv.conf as /etc/resolv.conf is necessary! To ensure name resolution for applications, the internal container waits for the router to be up, using depends_on: [router] in compose. Gateway address is assigned by docker automatically, while the router container takes care of providing routing at that address.
Apart from mounting resolv.conf for container name resolution – if desired -, no further configuration requirements for this container exist.
Usage
Examples are provided in examples/. Run docker-compose on the main compose file and the example to examine. Afterwards, play around; connect to containers and observe behavior; e.g:
add more containers, remove containers, remove the router-container, do not mount resolv.conf, etc..
Examples
compose files from examples/
up
Starts all containers. Runs a shell with attached tty in internal and external container to keep them alive. Use to run commands in the containers and observe the behavior; e.g. docker-compose exec internal ping external.
docker-compose -f docker-compose.yml -f examples/up.yml up
hello
external container listens on port 8888 using netcat, echoing hello from external @ channel opened from remote.
internal container connects to external on port 8888 using netcat, echoing hello from internal
The output from both containers can be observed in the docker-compose log.
docker-compose -f docker-compose.yml -f examples/hello.yml up
reverse-fail
Tries to ping internal from external. Uses router as DNS to resolve internal network container names. Run with --abort-on-container-exit to bring down all containers on individual container exit and observe exit code.
Find commented sections in docker-compose.yml relating to ROUTE_NET and/or ROUTE_GATEWAY. Setup IPAM config, and provide the subnet in CIDR notation to the router-container as ROUTE_NET=<my.su.bn.et/prefix>, to use a specific subnet. To use a specific gateway, provide ROUTE_GATEWAY in IPAM config and router-container environment.
All configuration is done with variables, preferably with set -U for universal variables.
Features
bettercd_resolve (default: fzf, format: resolver,resolver,...)
Specifies which resolvers are used for populating the list of candidate directories.
bettercd_tiebreak (default: common,fzf, format: tiebreaker,tiebreaker,...)
Specifies which tiebreakers are used for picking between multiple candidate directories.
bettercd_reporel (default: true, format: true or false)
If enabled, allows navigating relative to the git repo root with :/path/from/root.
Fuzzy matching is also still available for this!
Search Settings
bettercd_search_depth (default: 4, format: number)
Specifies how deep of a search the fzf resolver will do.
bettercd_search_z (default: best, format: all, best or common)
When using the z resolver, what answers returned by z will be used.
bettercd_user_search_exclude_paths (format: array)
Speicifes a list of absolute paths that the fzf resolver will ignore.
bettercd_user_search_exclude_names (format: array)
Speicifes a list of file globs that the fzf resolver will ignore.
Tweaks
bettercd_fzf_args (format: array)
A list of arguments passed to fzf in the fzf resolver.
bettercd_fzf_interactive_args (default: something nice, format: array)
A list of arguments passed to fzf in the fzf tiebreaker.
bettercd_fd_args (format: array)
A list of arguments passed to fd in the fzf resolver.
Resolvers
Bettercd’s fuzzy matching works by collecting a list of candidate paths for the provided search path. This is done with resolver functions, which take the search path and print out a list of candidate paths.
The fzf resolver uses a combination of fd and fzf to return a list of fuzzily-matching paths under the target directory. It is very likely to return a ton of candidates, and it’s recommended to use the fzf tiebreaker to pick one.
The z resolver uses z to print a list of paths that would be matched by z.
You can configure how many paths are returned by setting bettercd_search_z to either best, all, or common.
Custom Resolvers
You can create custom resolvers by defining a __bettercd_resolve_with_RESOLVER function:
function __bettercd_resolve_with_homedir
for dir in$HOME/*printf"%s\n" -- "$HOME"endend
Tiebreakers
Whenever bettercd’s fuzzy matching returns more than one candidate, it needs to be narrowed down to a single result. For this, there are tiebreaker functions.
The z tiebreaker uses the z database to pick the highest-weighted directory from the list of candidates. If no candidate is located in the database, the next tiebreaker will be used instead.
common-tiebreaker
The common tiebreaker simply picks the common parent of all candiates, if there is one. This is good for navigating to a parent directory without considering any of its children.
Custom Tiebreakers
You can create custom resolvers by defining a __bettercd_tiebreak_with_TIEBREAKER function:
function __bettercd_tiebreak_with_first
argparse 'x-nothing' -- $argv||return$statusecho$argv[1]
end
The reference implementation for the XMF markup language.
What is this, exactly?
The XMF file format specifies a declarative and fairly simple language designed for “manifests”. It is designed to be easily
modified in order to be applied many different cases. The best way to think of these files are to compare them to Docker’sDockerfiles as they serve very similar purposes. The main differences are that XMFs are
entirely customizable, and have the ability to interact with and manipulate variables.
Example .xmf File
IMPORT path/to/another/file.xmf  # Extend xmfs or simply import their defined functions
IMPORT classpath:/xmf/utils.xmf  # We bundle some optional utilities for conveinence
DEFINE MyVerb some.identifier.MyVerb  # This hooks your implementation of MyVerb to the current .xmf file

MyVerb blah blah  # Interact with verbs

$MY_VARIABLE<-yes, this is my variable  # Declare a variable

PRINT $MY_VARIABLE  # Prints the contents of $MY_VARIABLE to stdout
Want more info?
Check out the XMF file specifications here or view some example (and builtin) xmf files here
This project focuses on building a comprehensive and robust backend-focused application using modern web development techniques and technologies. It includes API development, database integration, authentication, and deployment.
Demo
Live Demo
The application is deployed and accessible at:
🔗 Voyage – Render (takes ~1min to warm up since it’s a free tier)
🔗 Voyage – Vercel (if Render is not available, however User Photo Upload is not available on Vercel since it’s a serverless service)
Log In With Existing Account
Field
Value
Email
loulou@example.com
Password
test1234
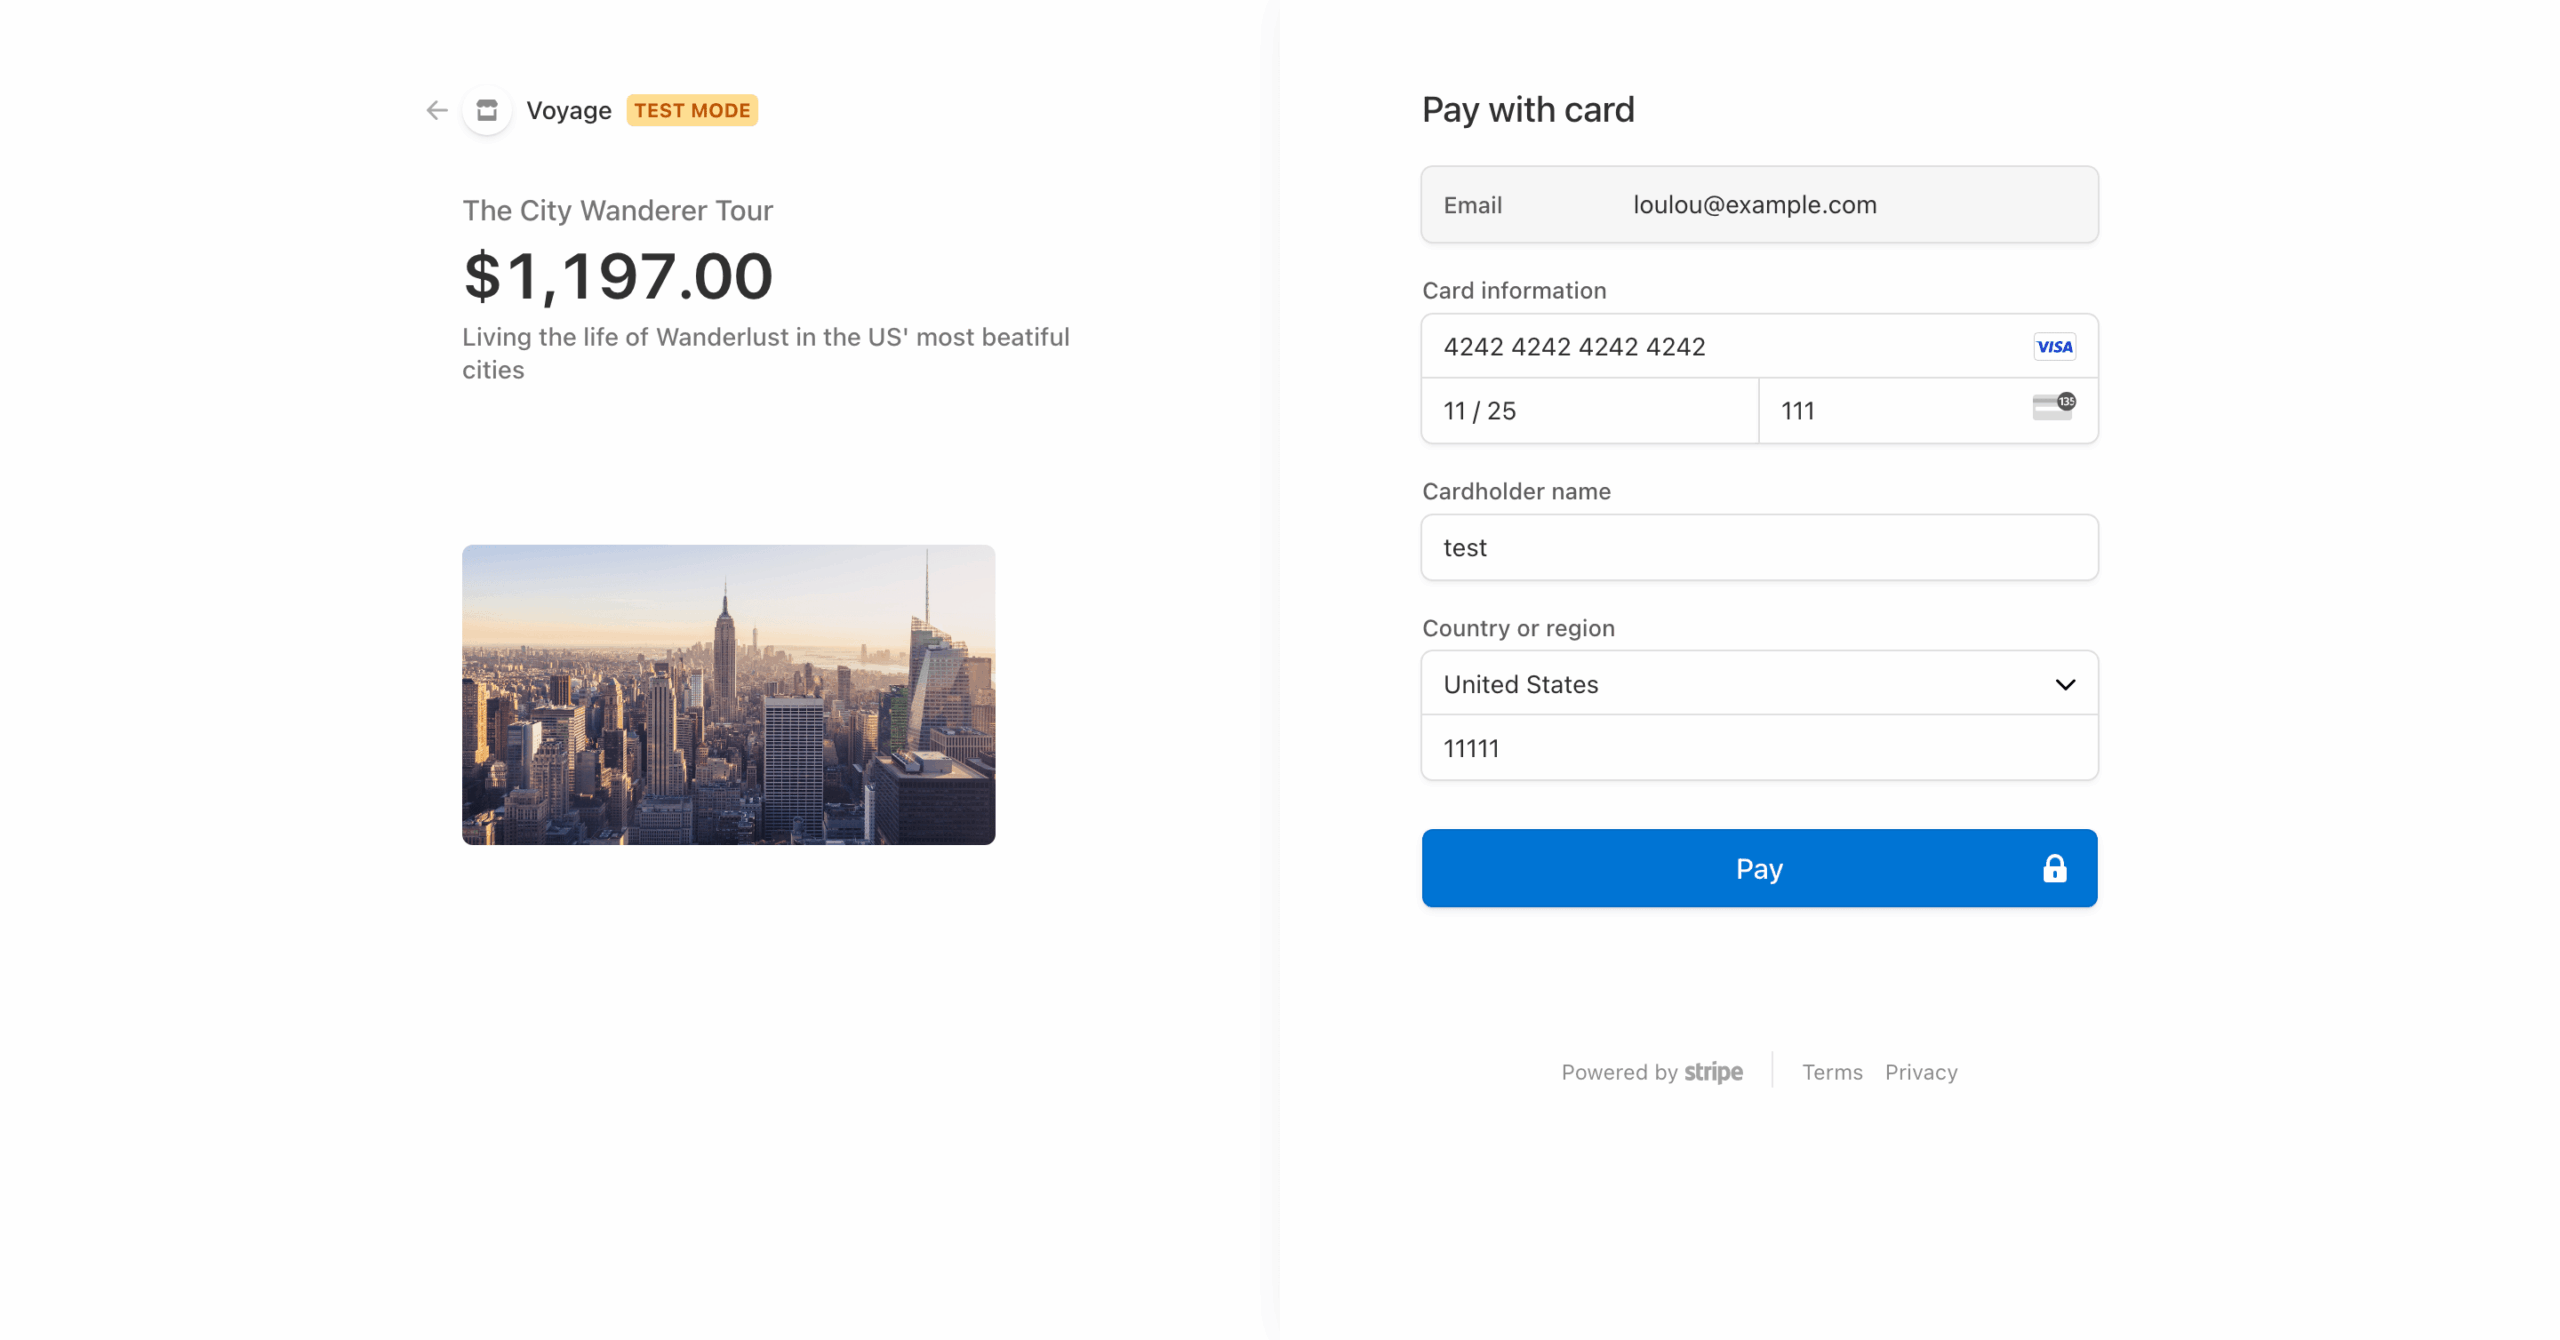
Demo Card for Payments
Field
Value
Card Number
4242 4242 4242 4242
Expiration Date
Any future date (e.g., 12/34)
CVC
Any 3 digits (e.g., 123)
ZIP Code
Any valid code (e.g., 12345)
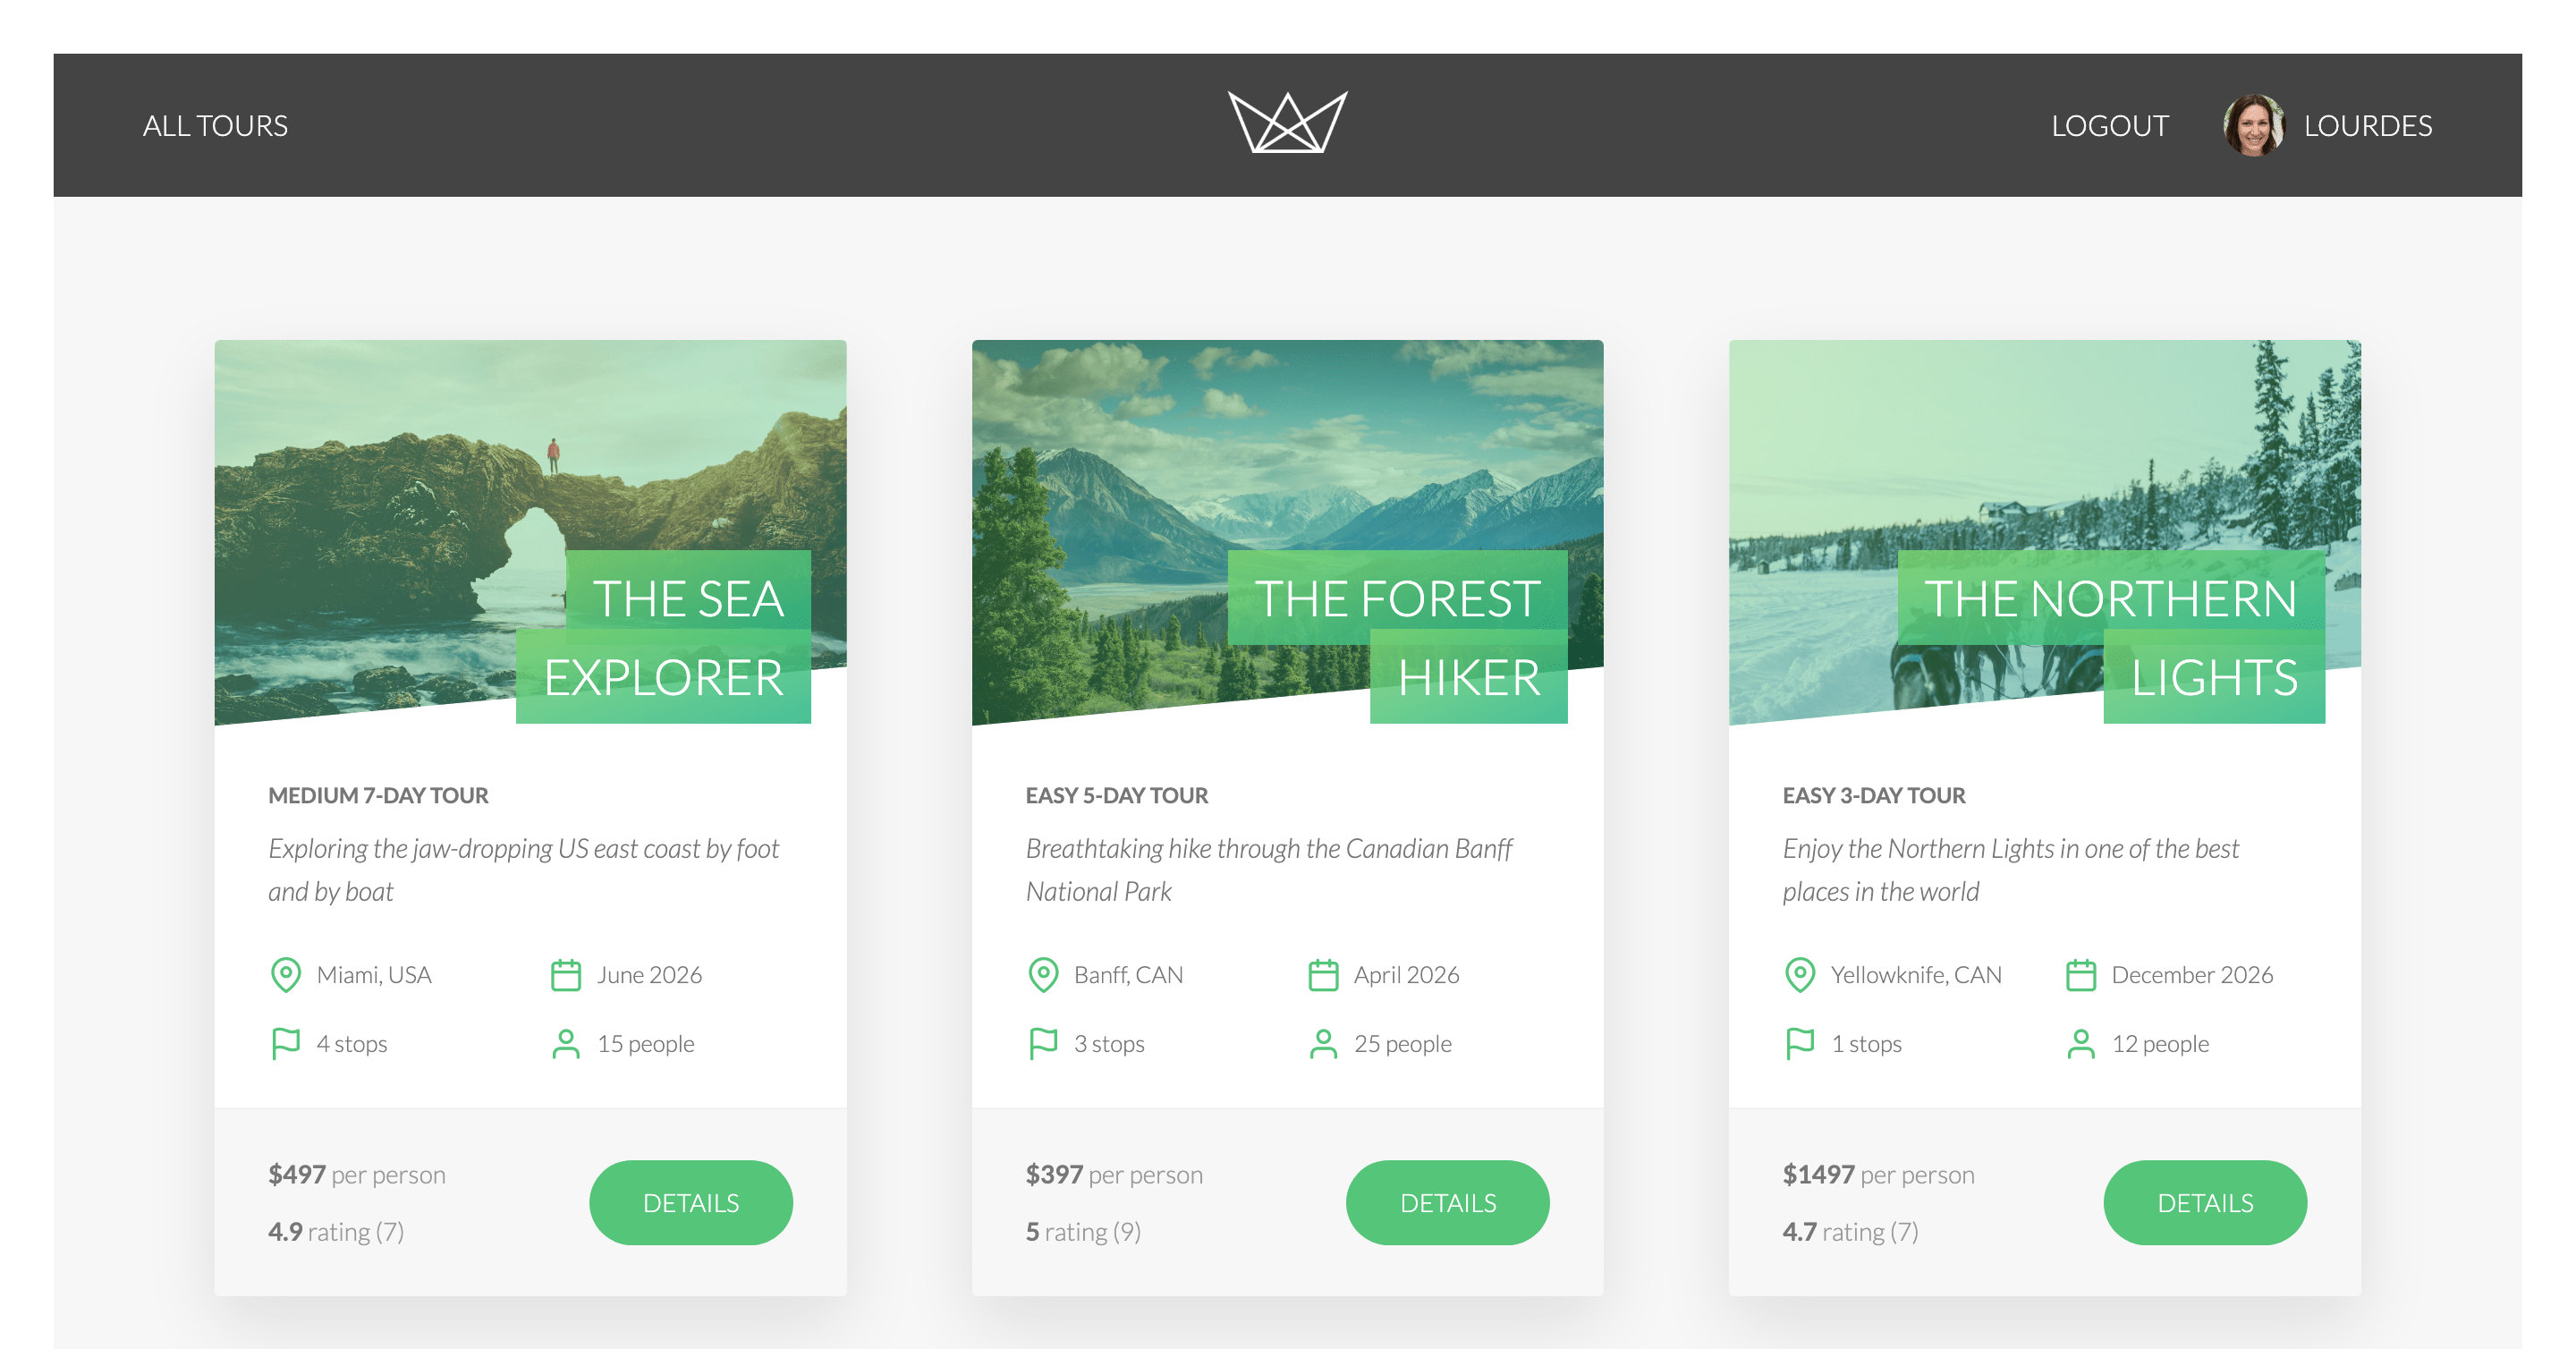
Screenshots
Key Features
RESTful API for managing travel-related data.
Secure authentication and authorization using JWT.
Robust database design with MongoDB and Mongoose.
Security enhancements to prevent vulnerabilities.
Efficient routing and middleware management with Express.js.
init will get mode from process.env or process.argv, read the .env* files, parse the content, handle the inheritance, and reture an object.
dotenv.init()
parse
Parse the content and return an Object with the parsed keys and values.
dotenv.parse(Buffer.from('PROT=3001'))
getConfig
Accept a mode and read .env* files, and handle the inheritance. return finally result.
Example
# Windows Powershell$env:mode="dev"
node .\example\index.mjs
# Mac
mode=dev node ./example/index.mjs
# or
node .\example\index.mjs --mode=dev
Suggest
Add .env.local* in your .gitignore file.
Why not dotenv
When you run your code in multiple environments, you may need some different environments variable. But dotenv didn’t support multiple .env files.
If you don’t use docker or other CI/CD environment variable to instead of .env file, or don’t use shell script to replace .env file, the multiple files is the easiest way to make it work.
For example, your server launched on port 3000, but you want to run on 3001 in local device, the .env file will be shared on repos which used git, so you need a .env.local file, this file has higher-priority then .env and it can doesn’t share with git.
You can create mutiple .env* files, and use them in different environments as easier as possible.
In this workshop, we’ll explore how to create decentralized Library. We will use the pre-written Tron smart contract and deploy it using TronBox, we can deploy contract on any Testnet or Mainnet.
This dApp uses Nuxt, but is out of scope for this workshop, so don’t worry, we will only be focusing on the pieces that helps us build. In practice, any JS framework can be used.
Please refer to the following steps to deploy this DApp on Nile testnet
If there is no Tron account, please use TronLink to create a new Account. And then apply for some test coins of Nile testnet for testing. Please make sure the account has enough TRX. Get test coins
5. Template clone
Now we have Setup installed properly, let’s grab the dApp template that we will use as the skeleton of our dApp. This template is a website built using Nuxt.js (don’t worry if you don’t know Nuxt.js, we are not focusing on this part).
Clone the template into your folder:
git clone https://github.com/TRON-Developer-Hub/decentralized-library

cd decentralized-library

npm install
6. Modify the privatekey in tronbox.js
Paste your account’s private key to ‘privateKey’ in tronbox.js
7. Smart Contract
Follow instructions to complete the smart contract code. If you only test the template code, please skip this step.
8. Deploy contract using TronBox
Compile contract:
tronbox compile
Deploy contract:
tronbox migrate --reset --network nile
On sucessfull deploy, copy the contract address
9. Paste your contract address to variable libraryContractAddress on line 5 in utils.js.
10. DApp code
Follow dapps to complete the DApp code. If you only test the template code, please skip this step.


 https://github.com/sndpl/cowsay